Customize your email and letter templates and the email you compose in Top Producer CRM with the easy-to-use editor. You don’t have to install anything to use it and can insert images/tables and format text to enhance your communications. The editor is available when you compose email and create/edit your letter and email templates.
Formatting Options
A standard assortment of editing and formatting options are available in the editor.
| Change the font type of selected text. See the FAQ below for information on the available fonts. | |
| Change the font size of selected text. | |
| Click these icons to apply bold, italic, underline and strikethrough formatting. | |
| Change the color of selected text. | |
| Change the background color for selected text. This is the electronic equivalent to using a highlighter pen to draw attention to specific text. | |
| Create a bulleted or numbered list. | |
| Decrease or increase the indent from the margin. | |
| Align selected text to the left, center or right. | |
| Insert a picture. See the FAQ below for details. | |
|
Insert a table. Alternatively, you can copy and paste tables from other documents. Note that columns and rows will adjust as you type. You cannot resize them by using the click and drag method. |
|
| Insert a link to a web site or for an email address. The text you enter in the Text field will be the clickable link. | |
| Insert a horizontal line at the cursor point. | |
| Click to edit the HTML source, or change from the default HTML format to Plain Text. If you change your format from HTML to Plain Text, you will lose all embedded pictures and any formatting. | |
| Click to display fullscreen edit mode. |
FAQs
Is the editor available for everyone to use? Do I need to download anything in order to use the editor?The old editor made use of the fonts on your computer, so you may notice there are less fonts available to use. The fonts you see in the new editor are stored on our server and are similar to the fonts you will find in any online email solution, including Gmail and Yahoo.
It is good practice to use common fonts. Doing so ensures your recipients will see the effect you’ve created. When sending email, the recipient won’t see the font you use unless they have it on their computer.
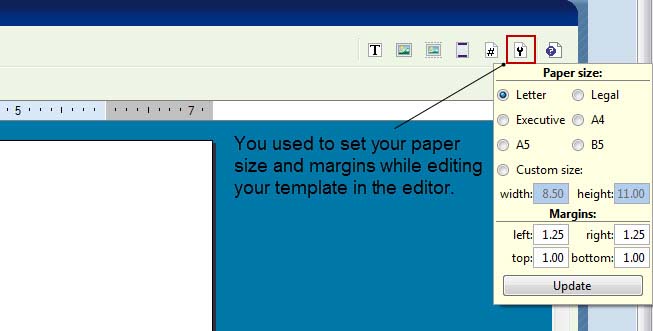
In the old editor, you set your page size and margins when editing your letter:
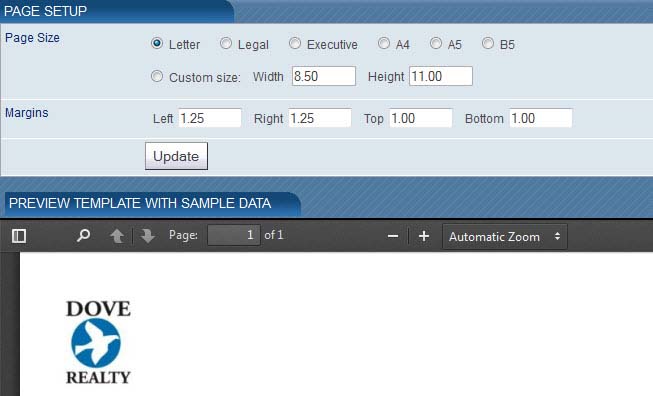
Now you set your page size and margins after you preview the letter. So when editing the letter, just click the Preview button at the bottom of the page > then set your page size and margins from the Preview window:
One of the easiest ways is to use a table. Just click the Table ![]() icon > Insert table > and select how many rows and columns you want. If you want some text or images on the left, some in the center, and some on the right, you can add a 3 column table as shown below.
icon > Insert table > and select how many rows and columns you want. If you want some text or images on the left, some in the center, and some on the right, you can add a 3 column table as shown below.

Unfortunately headers and footers aren’t supported. You can try adding a header/footer, but you’ll have to insert the header and footer on each page manually, since the editor doesn’t support them. If you do this, you’ll have to preview the template to see where the page breaks are and make sure the header and footer appear in the correct location.
Using the Table feature, you can insert a table to create a header/footer (see below). To do this, click the Table ![]() icon > Insert table > insert a table with 3 rows and 1 column.
icon > Insert table > insert a table with 3 rows and 1 column.
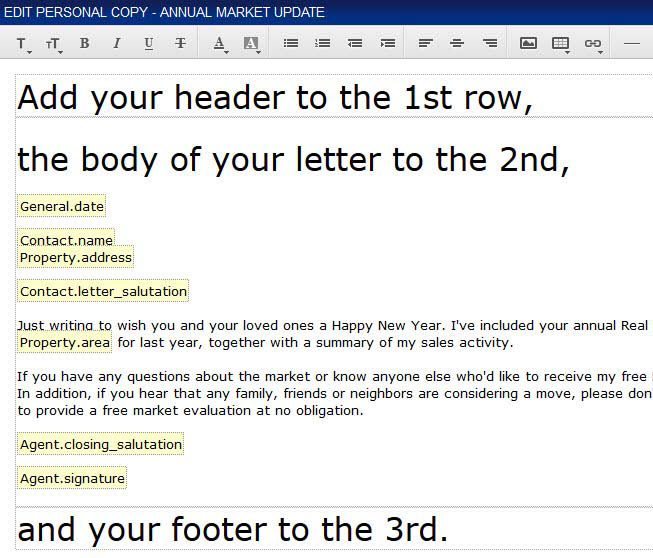
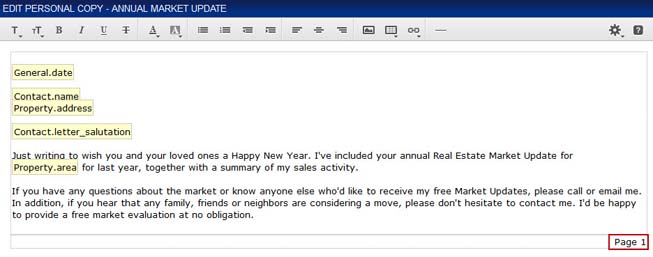
The editor doesn’t support page numbering, so the only way is to manually add them by entering the page numbers. This will require you to preview the template to see where the page breaks are and make sure the page numbers appear in the correct location.
If you want your page numbers to appear either in the center of the letter or on the right, you can insert a table (see below).
Click the Table ![]() icon > Insert table > insert a table with 2 rows and 1 column.
icon > Insert table > insert a table with 2 rows and 1 column.
The body of your letter can go in the 1st row, while your page number can go in the 2nd. Once you’ve entered your page number, select whether you want it to appear in the center ![]() or on the right
or on the right ![]() .
.
-
Click the Insert image
 icon on the toolbar.
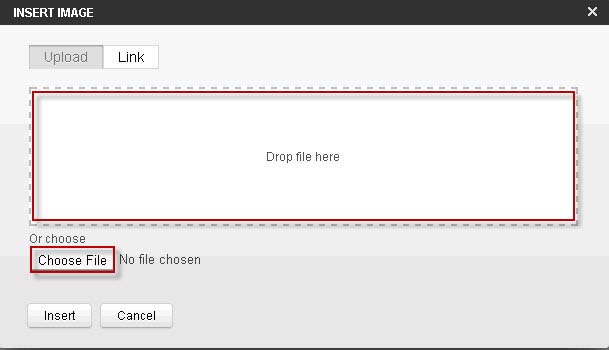
- Click Choose File to select an image stored on your computer. Alternatively, you can drag an image to the Drop file here area (shown above).
-
When finished, click Insert
Tip: You can also insert an image that is stored on the web. From the Insert Image dialog, click the Link tab > specify the image path > click Insert.
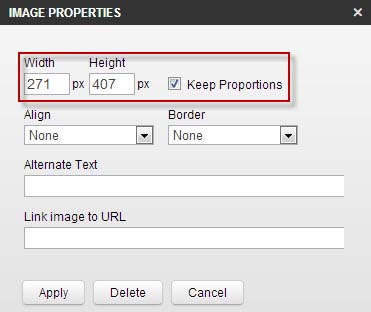
- Once the image has been inserted (see the FAQ above), click on it to resize it and set other properties.
- Specify the image’s Width and Height.
- Select Keep Proportions to ensure the width and height are proportional. If this option is selected, when you change the width or height dimensions, the other will automatically change proportionally.
-
When finished, click Apply.
Tip: You can also resize an image by holding down the left mouse button anywhere on the image and dragging your mouse diagonally.
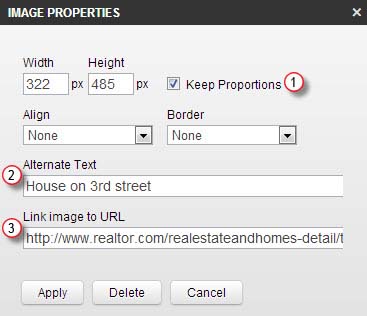
- Ensures the width and height are proportional. If this option is selected, when you change the width or height dimensions, the other will automatically change proportionally.
- If the recipient is unable to view the image, you can type text that will appear in place of the picture.
- If you want your image to display a web site when clicked, enter the URL.
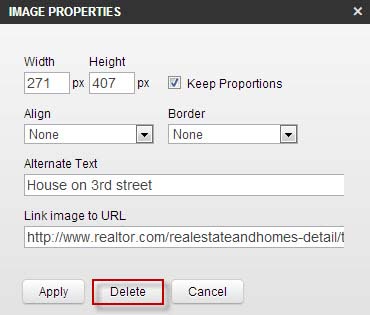
- Click the image you want to delete to display the Image Properties dialog.
- Click the Delete button.
Yes, you can insert tables by clicking the Table ![]() icon. You can also copy and paste tables from other documents.
icon. You can also copy and paste tables from other documents.
